6. Large format CNC (computer controlled Machining)
This week, I designed a small house for my cat using a CNC machine, and we collaborated as a group on the CNC project.
What is CNC Machining?
CNC stands for Computer Numerical Control, a technology that utilizes computer programs to automate and precisely manage the operation of machine tools such as mills, lathes, and routers. CNC allows for highly automated, efficient, and consistent manufacturing processes across a range of industries.
Group assignment
And here is our group assignment.
Thanks to BATOOL ALI for her excellent work!
you can click the link to view our group assignment on the CNC Machine
Individual assignment
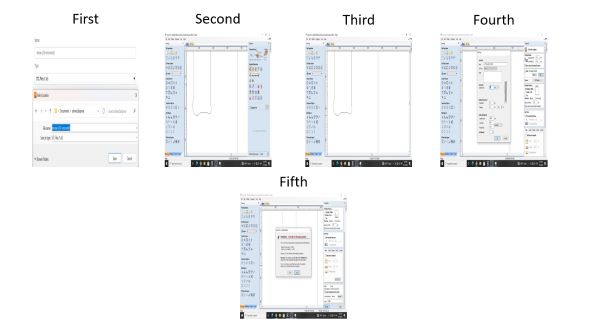
For my individual assignment, I used Autodesk Fusion to design a house for my cat to protect her from the heat and give her a stylish, cool shelter. I then cut the design using the CNC Machine.
Procedure
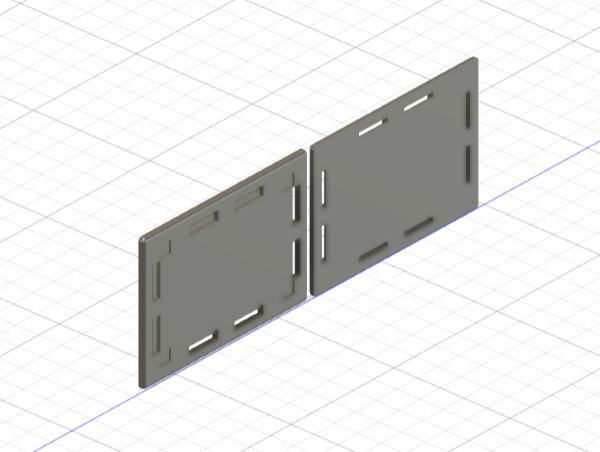
- Step 1: I created the base and top of the house by drawing rectangles that are 400 mm wide and 280 mm long. Then, I drew four squares, each measuring 40 mm in width and length, on the back side of the base of the house.
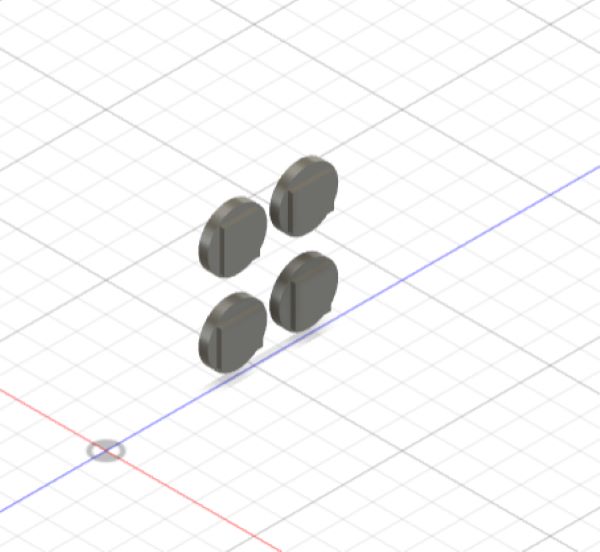
- Step 2: I designed four spacers to keep the house stable and secure. I started by drawing a circle with a diameter of 60 mm and extruding it by 5 mm. Then, I created a rectangle inside the circle and extruded it by 7 mm, considering that the thickness of the MDF sheet I was using is 12 mm.
Note: To simplify the process, I decided to create just one spacer and then copy it three times. This option is often very helpful when making objects or bodies that have similar dimensions.
- Step 3: Next, I created the sides of the house by drawing squares that measure 280 mm by 280 mm.
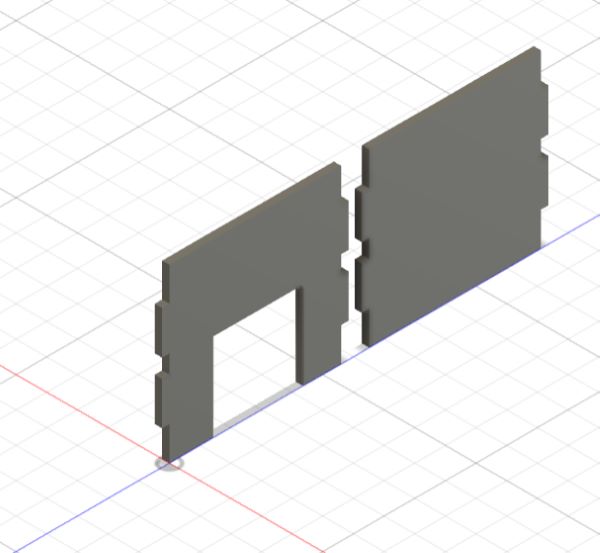
- Step 4: As you can see, I created the front and back of the house by drawing rectangles that measure 280 mm by 400 mm.
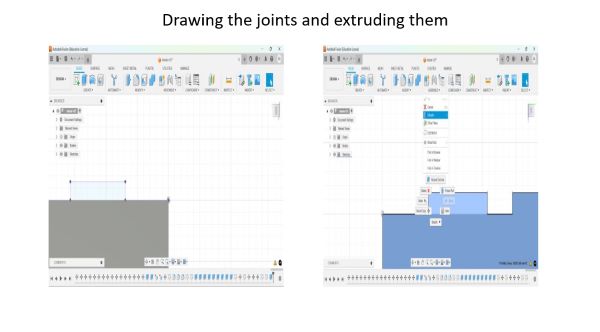
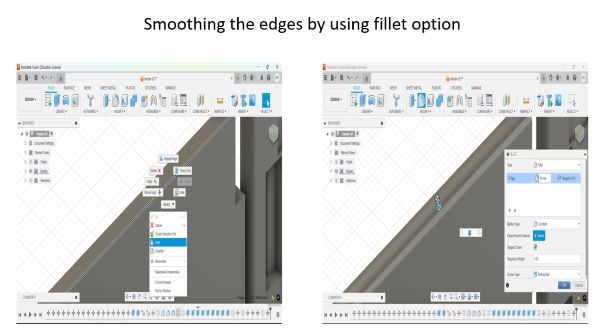
- Step 5: I created the joints for each panel and then extruded the pieces by 12 mm, as the thickness of the MDF sheet we were using is 12 mm. After that, I smoothed the outer edges by selecting the fillet option and choosing the edges I wanted to apply the fillet to.
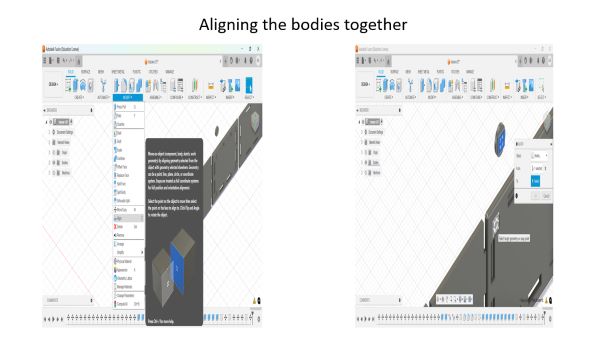
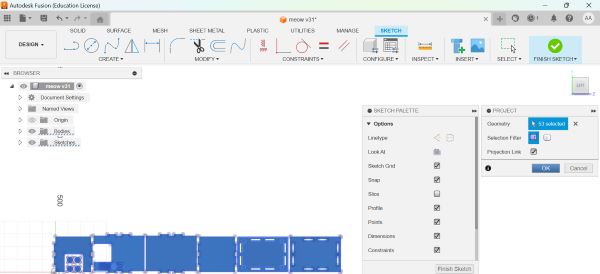
- Step 6: I assembled the house in Autodesk Fusion by using the Align option, selecting the faces of the joints, and aligning them with the slots on the other panels.
-
Step 7: I pressed the letter “P” on the keyboard, selected the faces I wanted to cut on the CNC machine, and then clicked the OK option.
-
Step 8: I manually added the dog bone from the PC connected to the CNC machine, then tapped on the “Start” option to begin the cutting operation.
And here’s a short video of the CNC machine in action while it’s cutting.
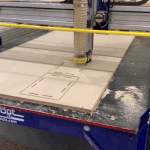
- Lastly, I waited for the CNC machine to finish cutting before removing the pieces and assembling them. It’s important to stay at least 5 feet away from the machine and remain near the remote control until the cutting is complete. Always remember to wear safety gear, such as goggles, a mask to protect against sawdust, and gloves if necessary. If anything goes wrong, you should press the red emergency button to pause the machine. Fortunately, everything went very smoothly in my case.
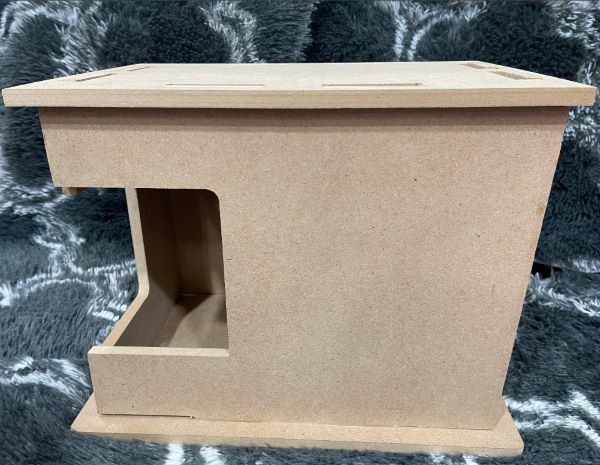
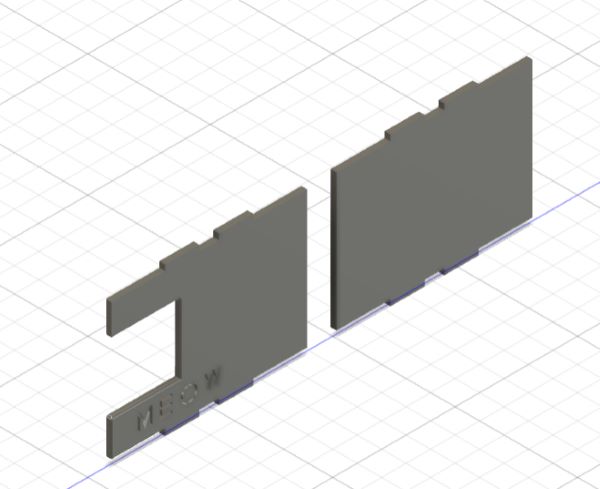
And here is the final product I created by cutting it with the CNC machine.