Embedded programming
What is Embedded programming in microcontrollers?
Embedded programming in microcontrollers involves creating software that runs on microcontroller units (MCUs), which are compact chips designed to manage specific tasks in embedded systems. Here are the main points:
Definition: Microcontrollers are small computers integrated onto a single chip that includes a processor, memory, and input/output peripherals, making them suitable for device control.
Programming Languages: Common languages for microcontroller programming include C and C++, with assembly language used for performance-critical tasks. Some microcontrollers also support higher-level languages like Python or JavaScript in specific environments.
Development Environment: Developers typically use integrated development environments (IDEs) that offer tools for writing, compiling, and debugging code, such as Arduino IDE, MPLAB, and Keil.
Real-Time Operations: Many applications require real-time processing, meaning the microcontroller must respond to inputs or events within a specific timeframe.
Hardware Interaction: Embedded programming involves direct communication with hardware components like sensors, actuators, and communication interfaces (e.g., I2C, SPI, UART).
Applications: Microcontrollers are found in various devices, including home appliances, automotive systems, robotics, medical devices, and IoT applications.
Resource Constraints: Programming for microcontrollers often requires careful management of limited resources like memory and processing power to ensure efficiency and reliability.
In summary, embedded programming in microcontrollers is vital for developing software that controls a wide range of devices and systems, ensuring they function effectively and efficiently.
Group assignment
Research
Simple research about a microcontroller (ESP32)

Laser cutting
What is laser cutting?
Laser cutting is a method that employs a laser to vaporize materials, resulting in a sharp edge. While it was originally designed for industrial manufacturing, it is now utilized by schools, small enterprises, architects, and hobbyists. Laser cutting is accomplished by directing the output of a high-power laser, most typically using optics. Laser optics and CNC (computer numerical control) are utilized to guide the laser beam to the material. A commercial laser for cutting materials employs a motion control system that follows a CNC or G-code of the design to be cut into the material. The concentrated laser beam is aimed at the material, which melts, burns, vaporizes, or is blasted away by a jet of gas, leaving a high-quality surface finish.
Group assignment
The effort goes to FAISAL FATHI for his nice work
you can click on the link to view our group assignment on laser cutting
3D printing
What is 3D printing?
3D printing, also known as additive manufacturing, is the process of creating a three-dimensional object from a CAD or digital 3D model. It can be done via a number of processes in which material is deposited, connected, or solidified under computer control, with the material being added together, usually layer by layer.
Group assignment
And this is our group assignment which was documented by ALI ABBAS
CNC Machining
What is CNC Machining?
CNC stands for Computer Numerical Control, a technology that uses computer programs to automate and precisely control the operation of machine tools like mills, lathes, and routers. CNC enables highly automated, efficient, and repeatable manufacturing processes across various industries.
Group assignment
And this our group assignment.
The effort goes to BATOOL ALI for her nice work
you can click on the link to view our group assignment on CNC Machining
Molding and casting
What is molding and casting?
Molding and casting are techniques used to form objects from various materials, often employed in manufacturing and artistic endeavors.
Molding
Molding is the process of creating a hollow shape known as a mold, which determines the final product’s form. The mold can be constructed from materials such as metal, plastic, or silicone. The procedure generally involves:
Mold Creation: A mold is formed by shaping a material around a model or using a two-part design.
Filling the Mold: The selected material (such as resin, plaster, or metal) is poured into the mold.
Solidification: The material hardens inside the mold, taking on its shape.
Casting
Casting is the method of pouring a liquid material into a mold, allowing it to solidify into a specific shape. This process can utilize various materials, including metals, plastics, and concrete. The primary steps include:
Mold Preparation: A mold is made, often in two sections.
Material Pouring: The liquid is poured into the mold.
Curing: The material is left to harden, after which the mold is removed to reveal the finished item.
Key Differences
Molding typically refers to the creation of the mold itself, whereas casting involves the act of pouring material into the mold.
Molding can be considered a part of the casting process since molds are essential for shaping the final product.
Both methods are widely used across various sectors, including manufacturing, art, and construction.
Group assignment
For our group assignment, we worked with the resin and hardener mixture. The mold was ready to receive the mixture, but first, we conducted research on the material we wanted to use. We gathered information about aspects such as mixing ratios and working times, among other details. And our group assignment was listed under the name material 3
click to view our group assignment
Procedure
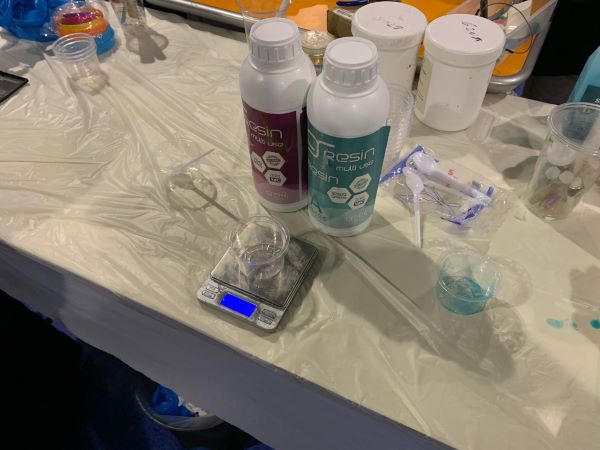
- Step 1: We set up all the materials and tools we would be using, including the scale, gloves, plastic spoons, and plastic cups.

- Step 2: I placed the plastic cup on the scale and poured in 10 grams of resin, then mixed it for at least 2 minutes.
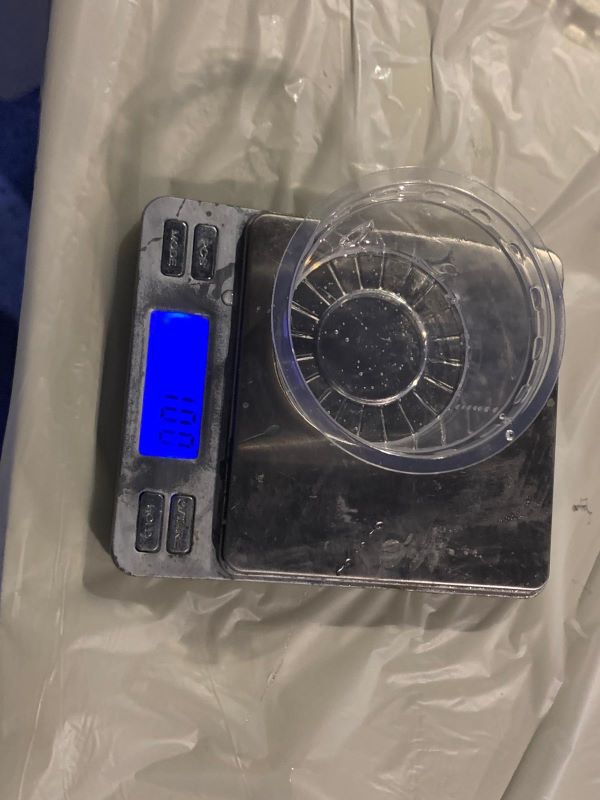

- Step 3: I repeated the same process for the hardener, pouring in 6 grams, as the mixing ratio for the material we were using is 10 grams of resin to 6 grams of hardener, as indicated on the bottle stickers. Then, I mixed the hardener for two minutes.

-
Step 4: After mixing each material separately for 2 minutes, we poured the resin into the hardener cup and mixed it for 2 minutes. Then, we poured the mixture back into the resin cup and mixed it for another 2 minutes.
-
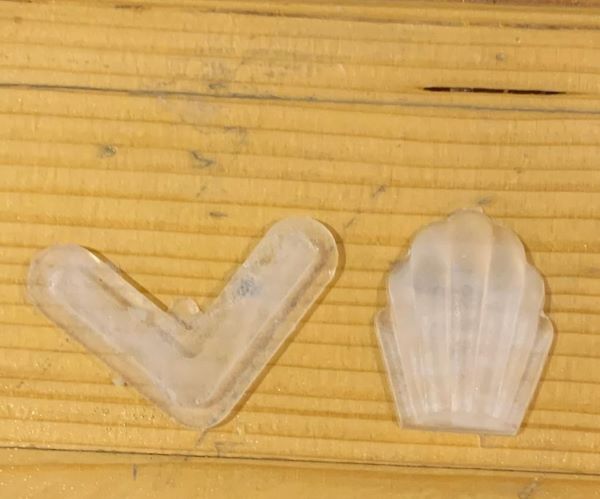
Lastly, we poured the hardener and resin mixture into the mold to create two beautiful castings, and we had to wait 24 hours for the mixture to fully cure at room temperature.
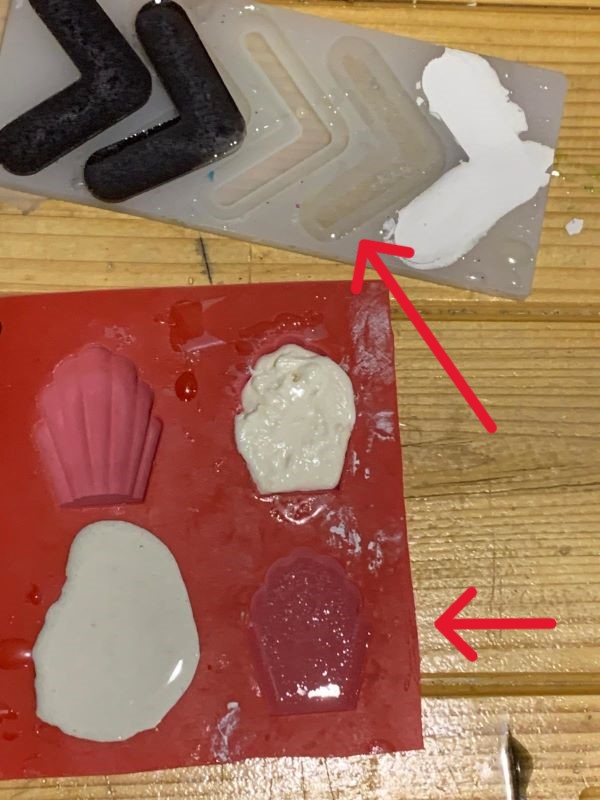
And here are the final results we achieved.